

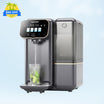
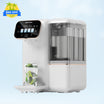
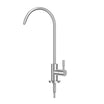

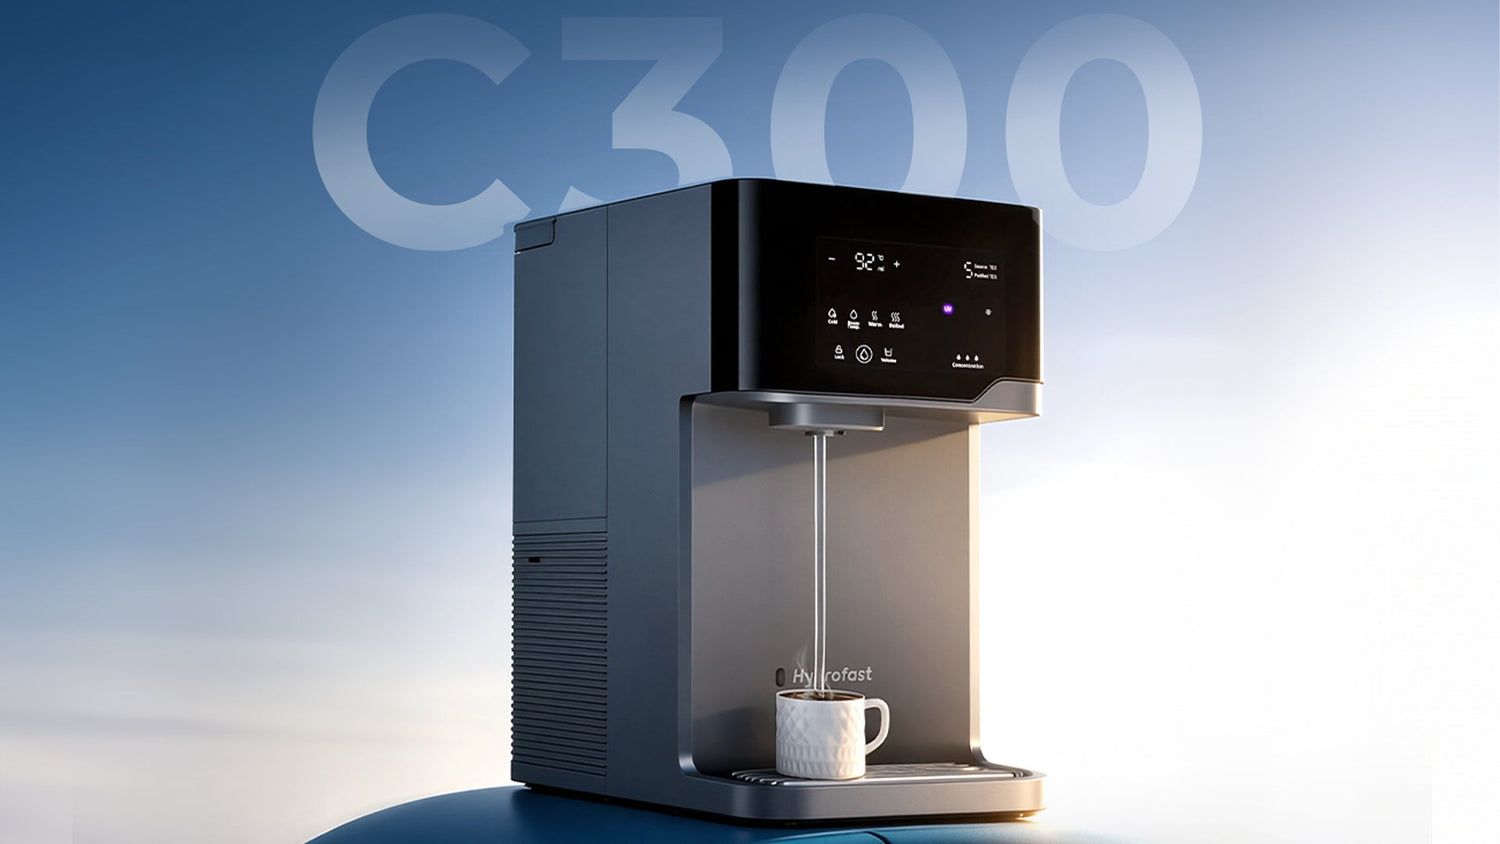
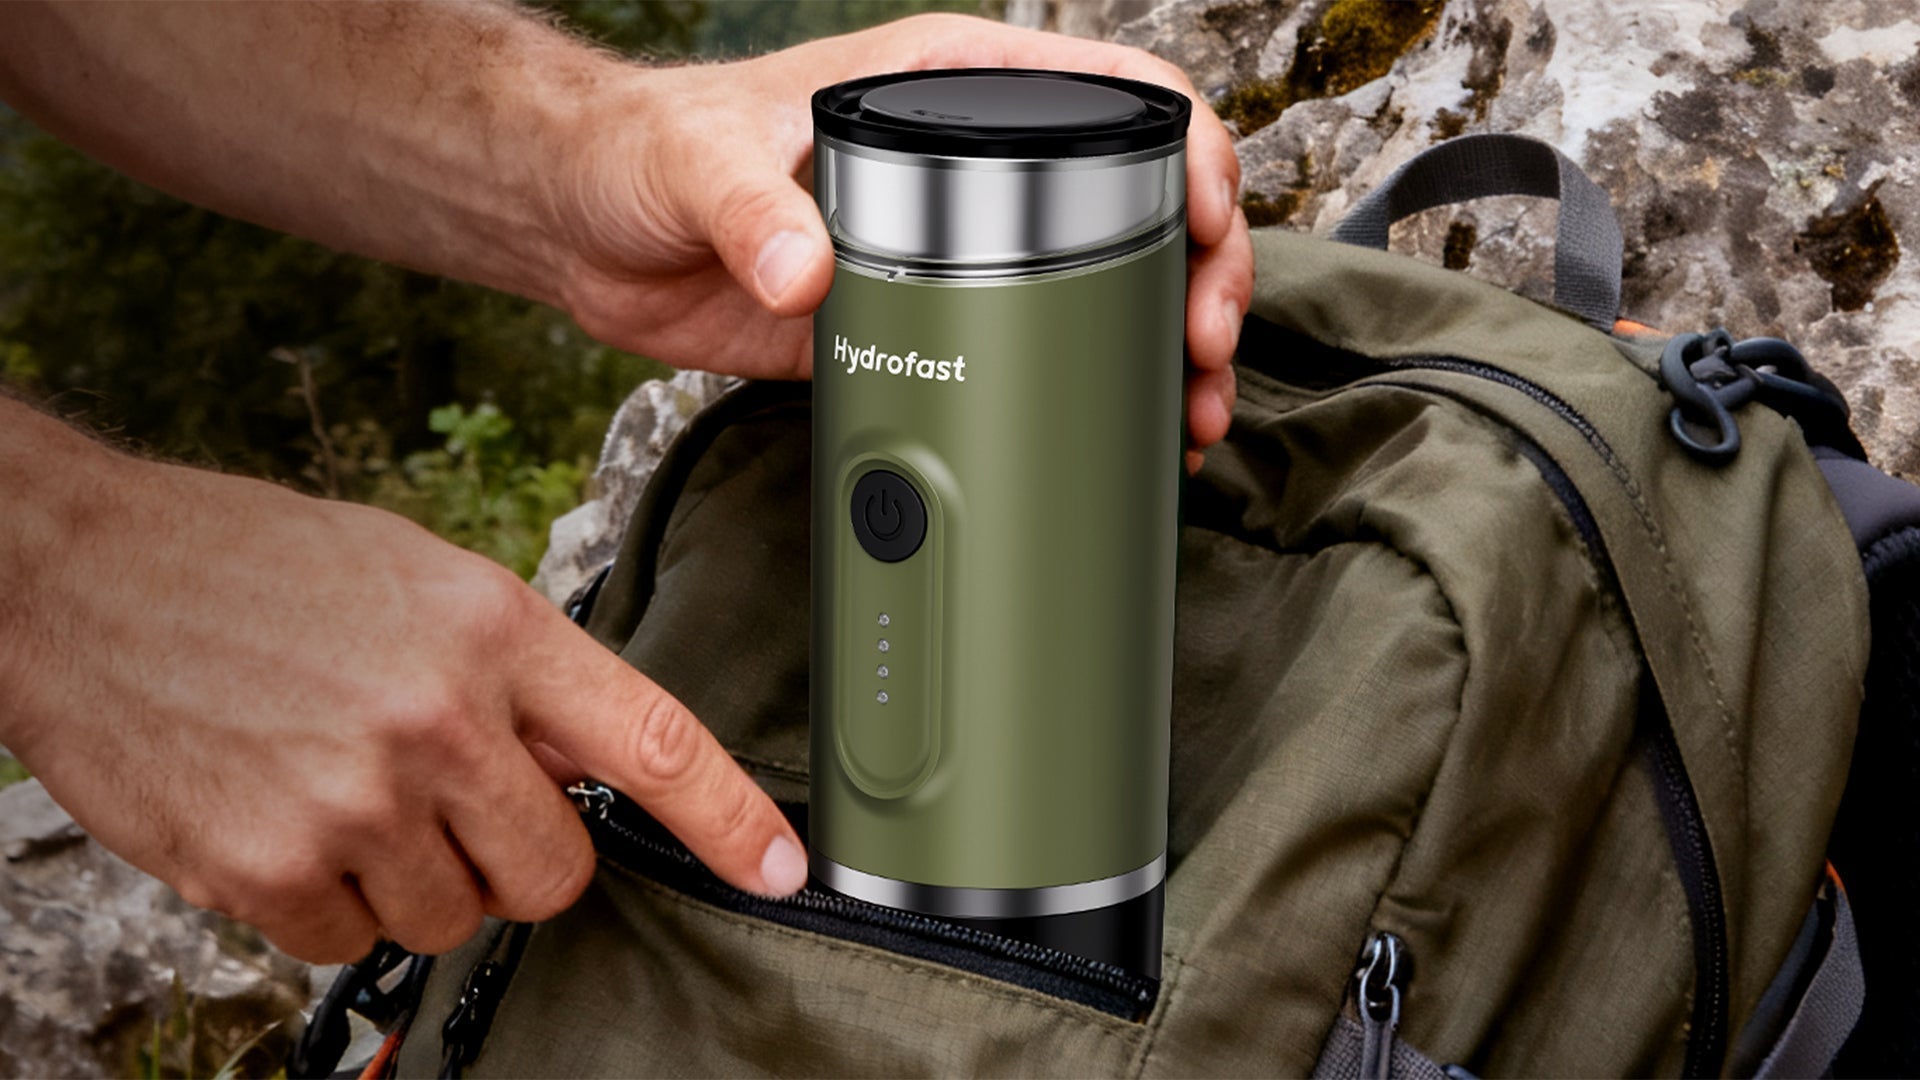
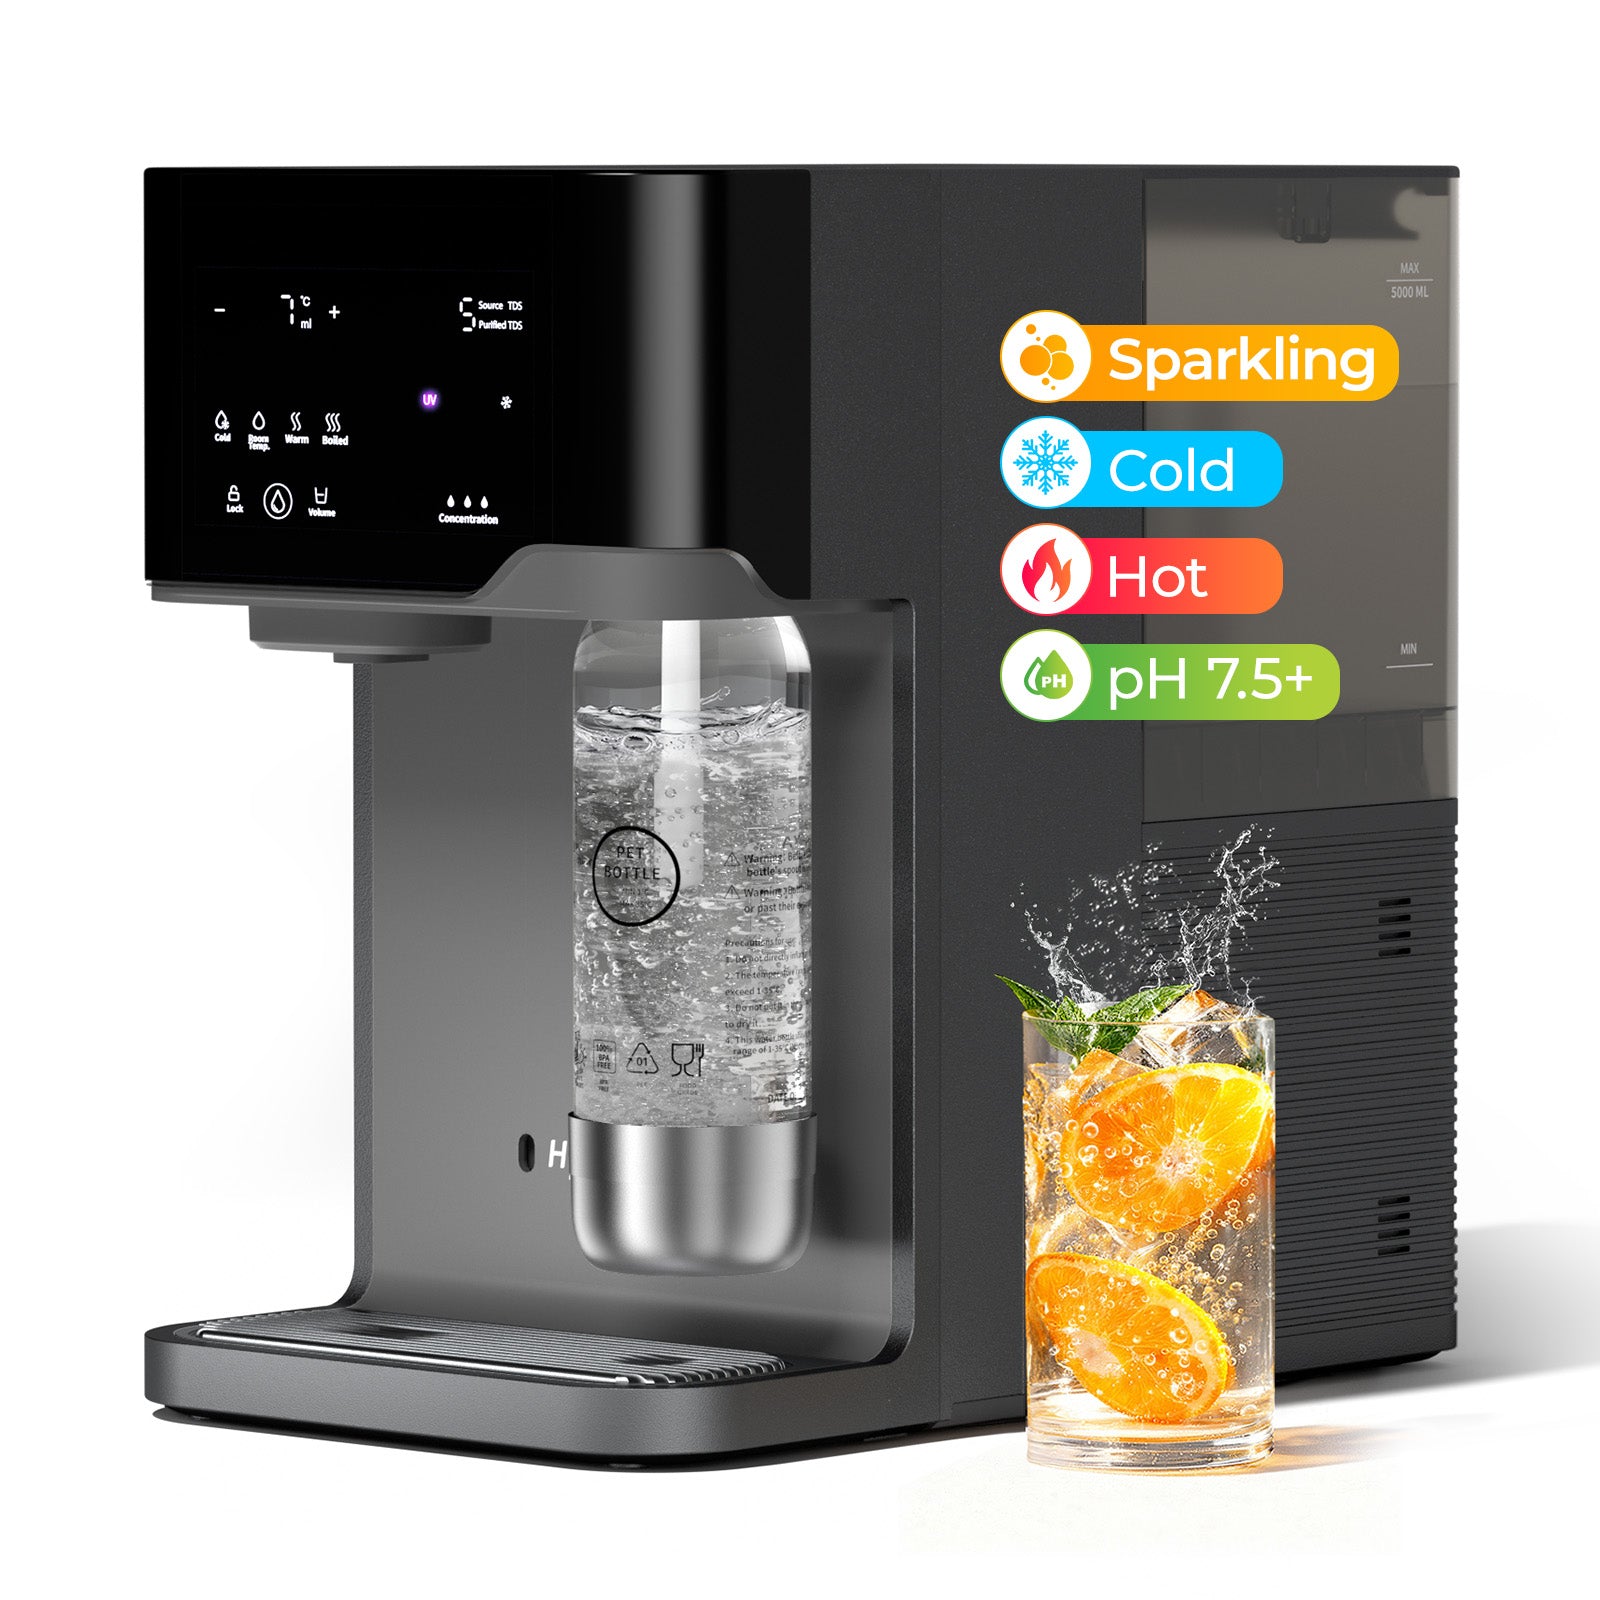
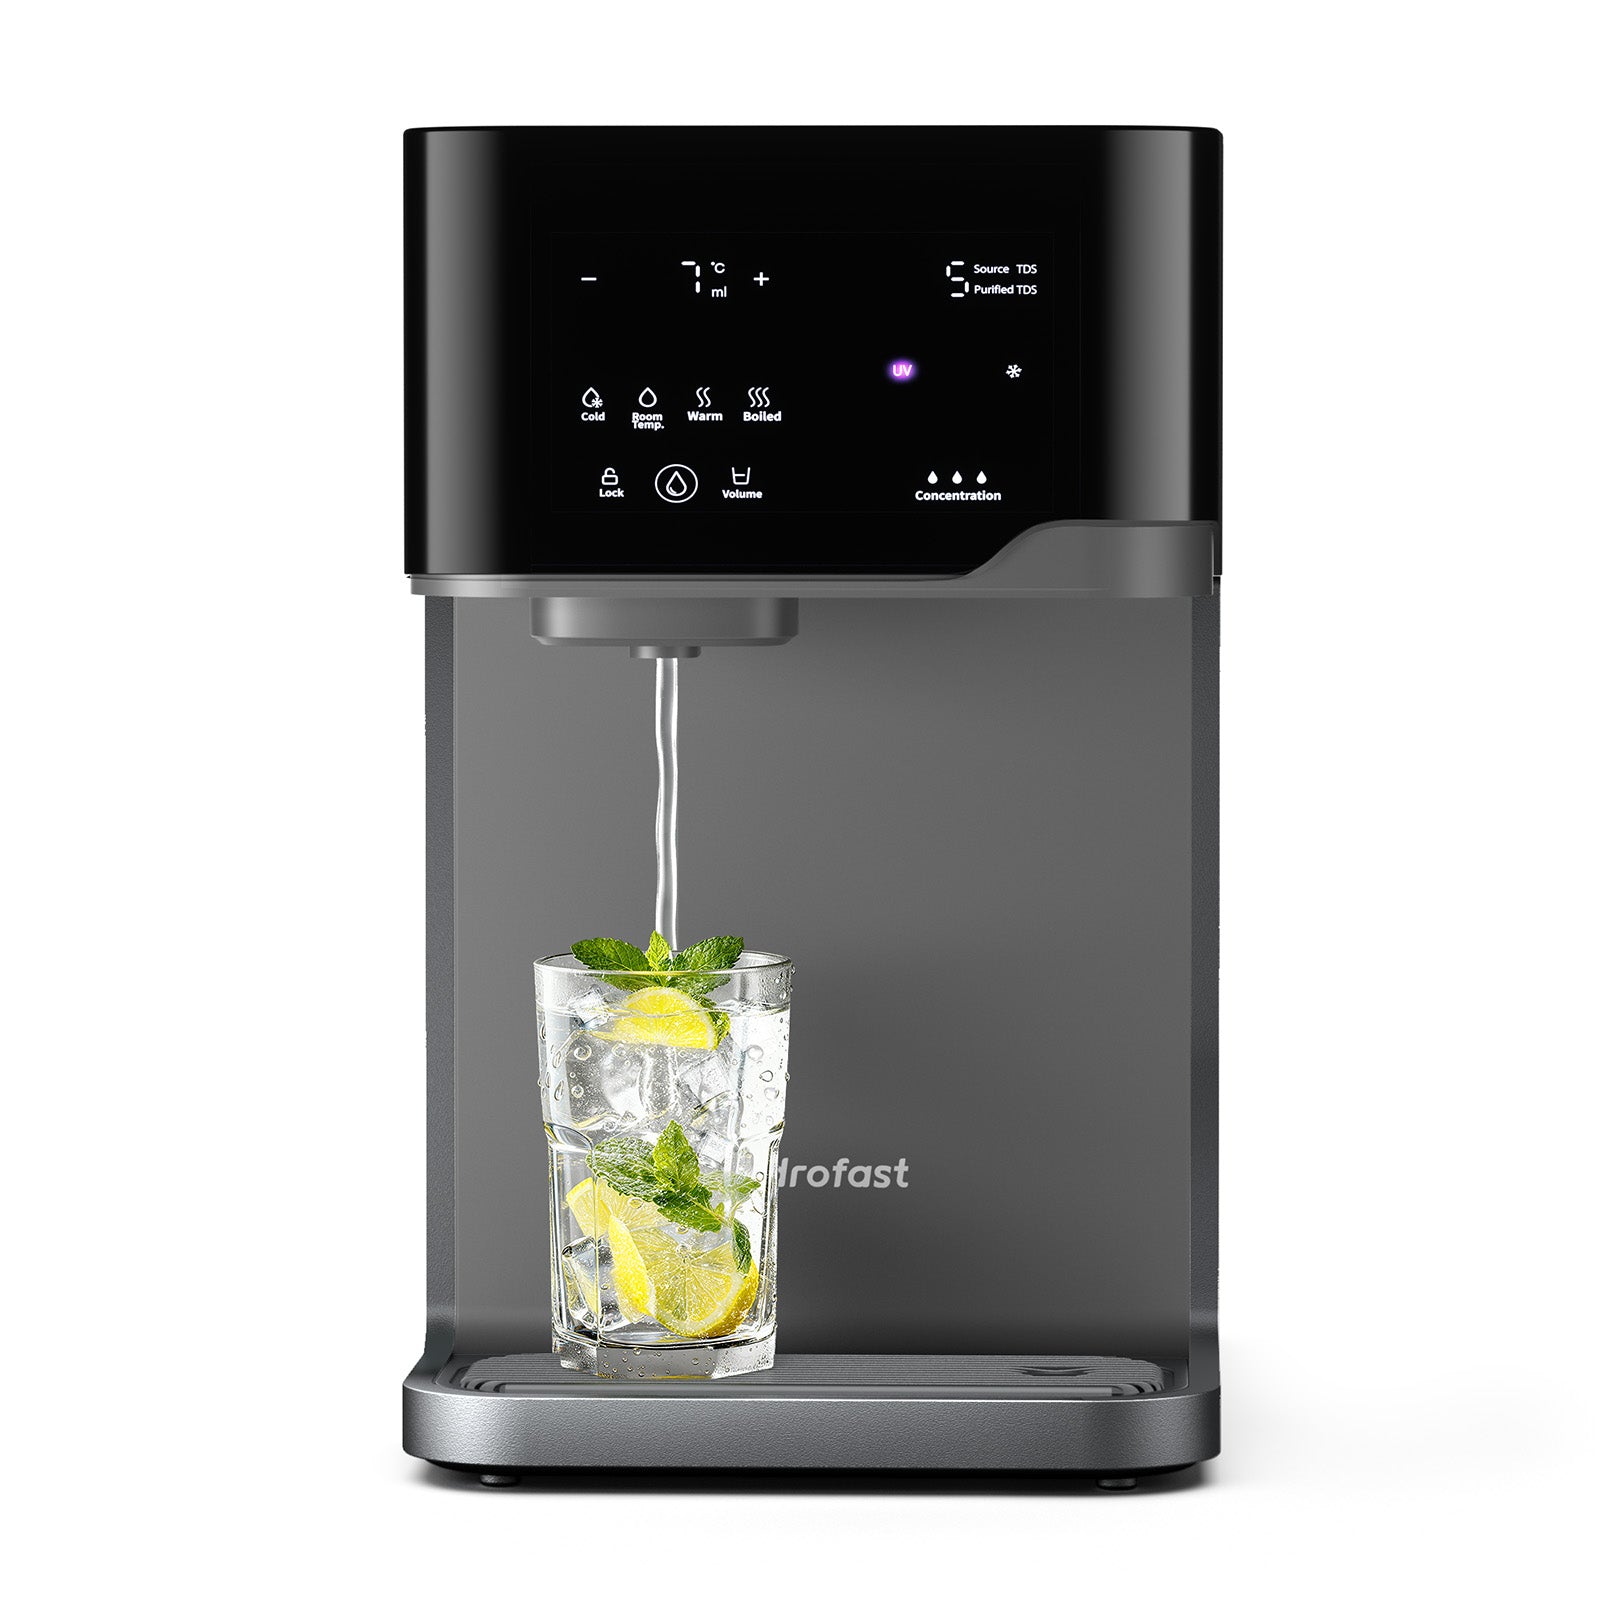
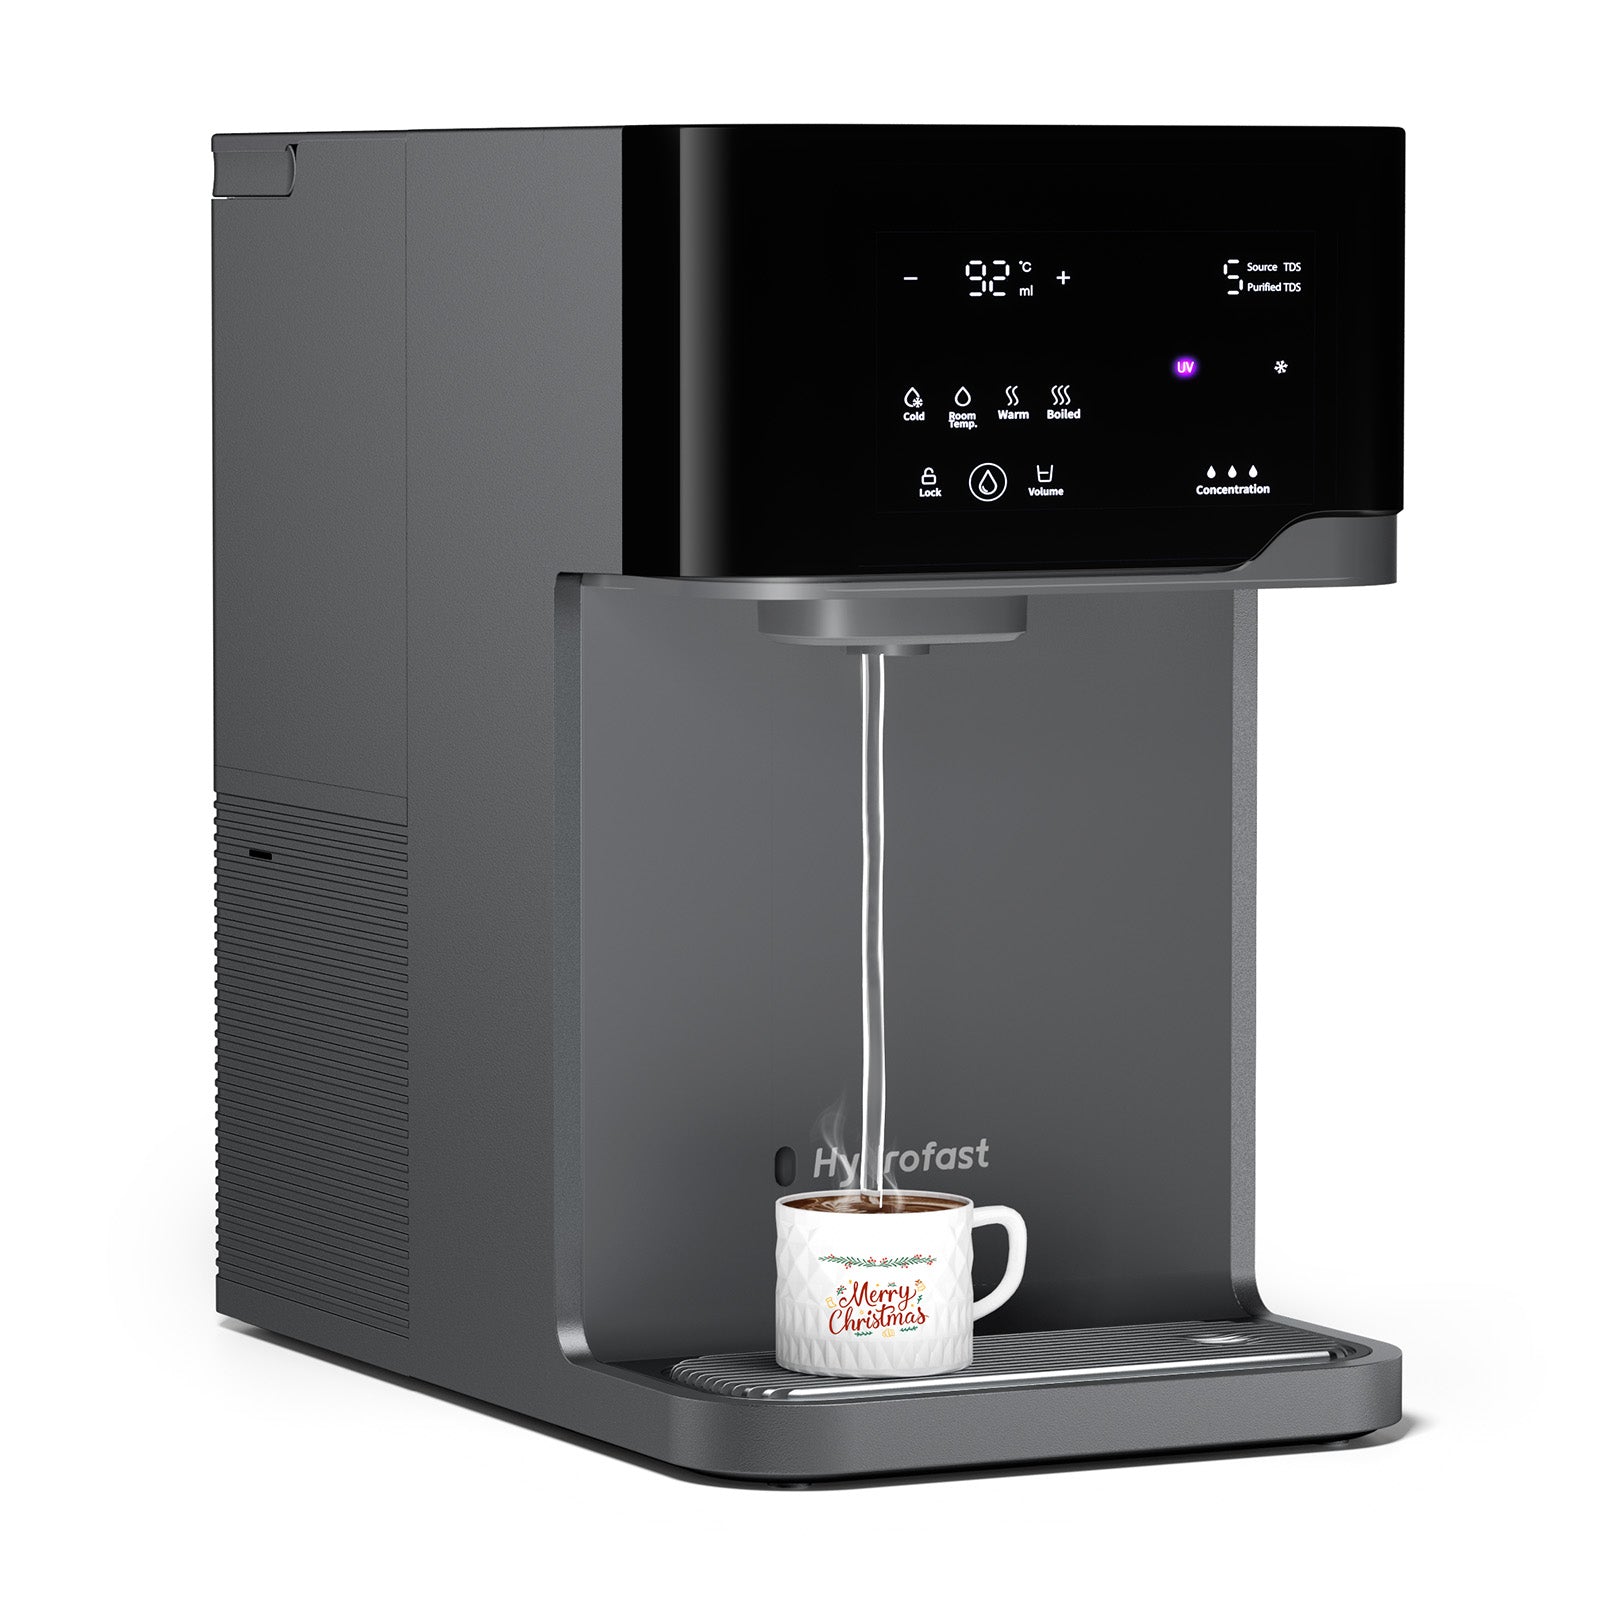
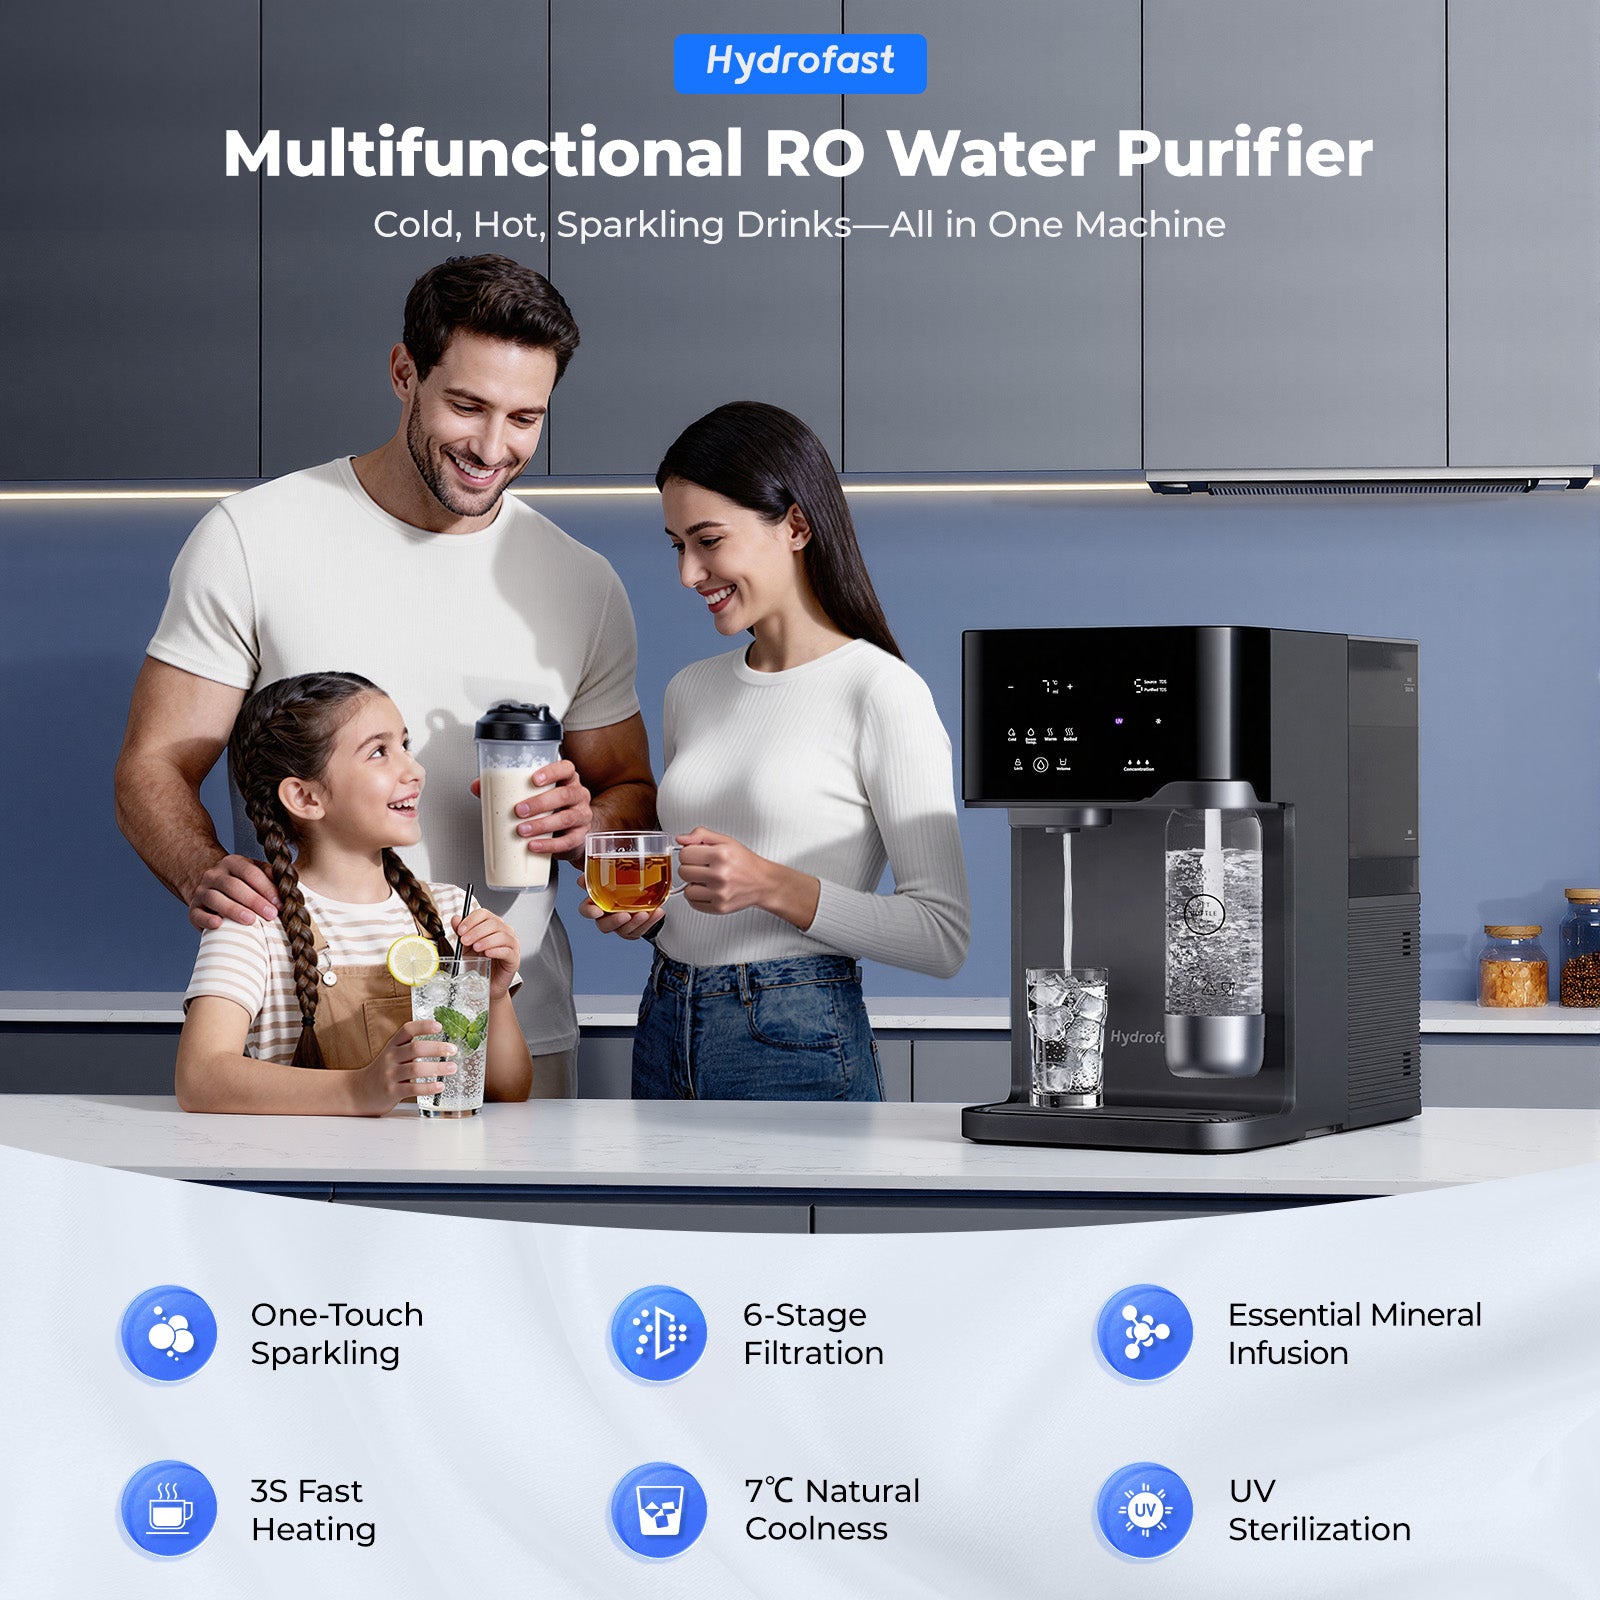
Bem-vindo ao futuro da hidratação em casa. Se adquiriu recentemente o Filtro de água RO multifuncional Hydrofast C300Está prestes a desfrutar de uma experiência premium com água, que combina a pureza da osmose inversa com a conveniência de água quente, fria e até com gás instantaneamente. Este sistema de bancada "tudo-em-um" foi concebido para se integrar perfeitamente no seu estilo de vida moderno, mas para obter o melhor desempenho, uma instalação adequada é fundamental.
Neste guia completo, iremos guiá-lo em cada etapa do processo de instalação, conforme descrito no manual oficial do utilizador. Abordaremos também dicas essenciais de segurança e conselhos de manutenção para manter o seu C300 a funcionar sem problemas durante muitos anos.
1.º Entendendo o seu Hidrofast C300
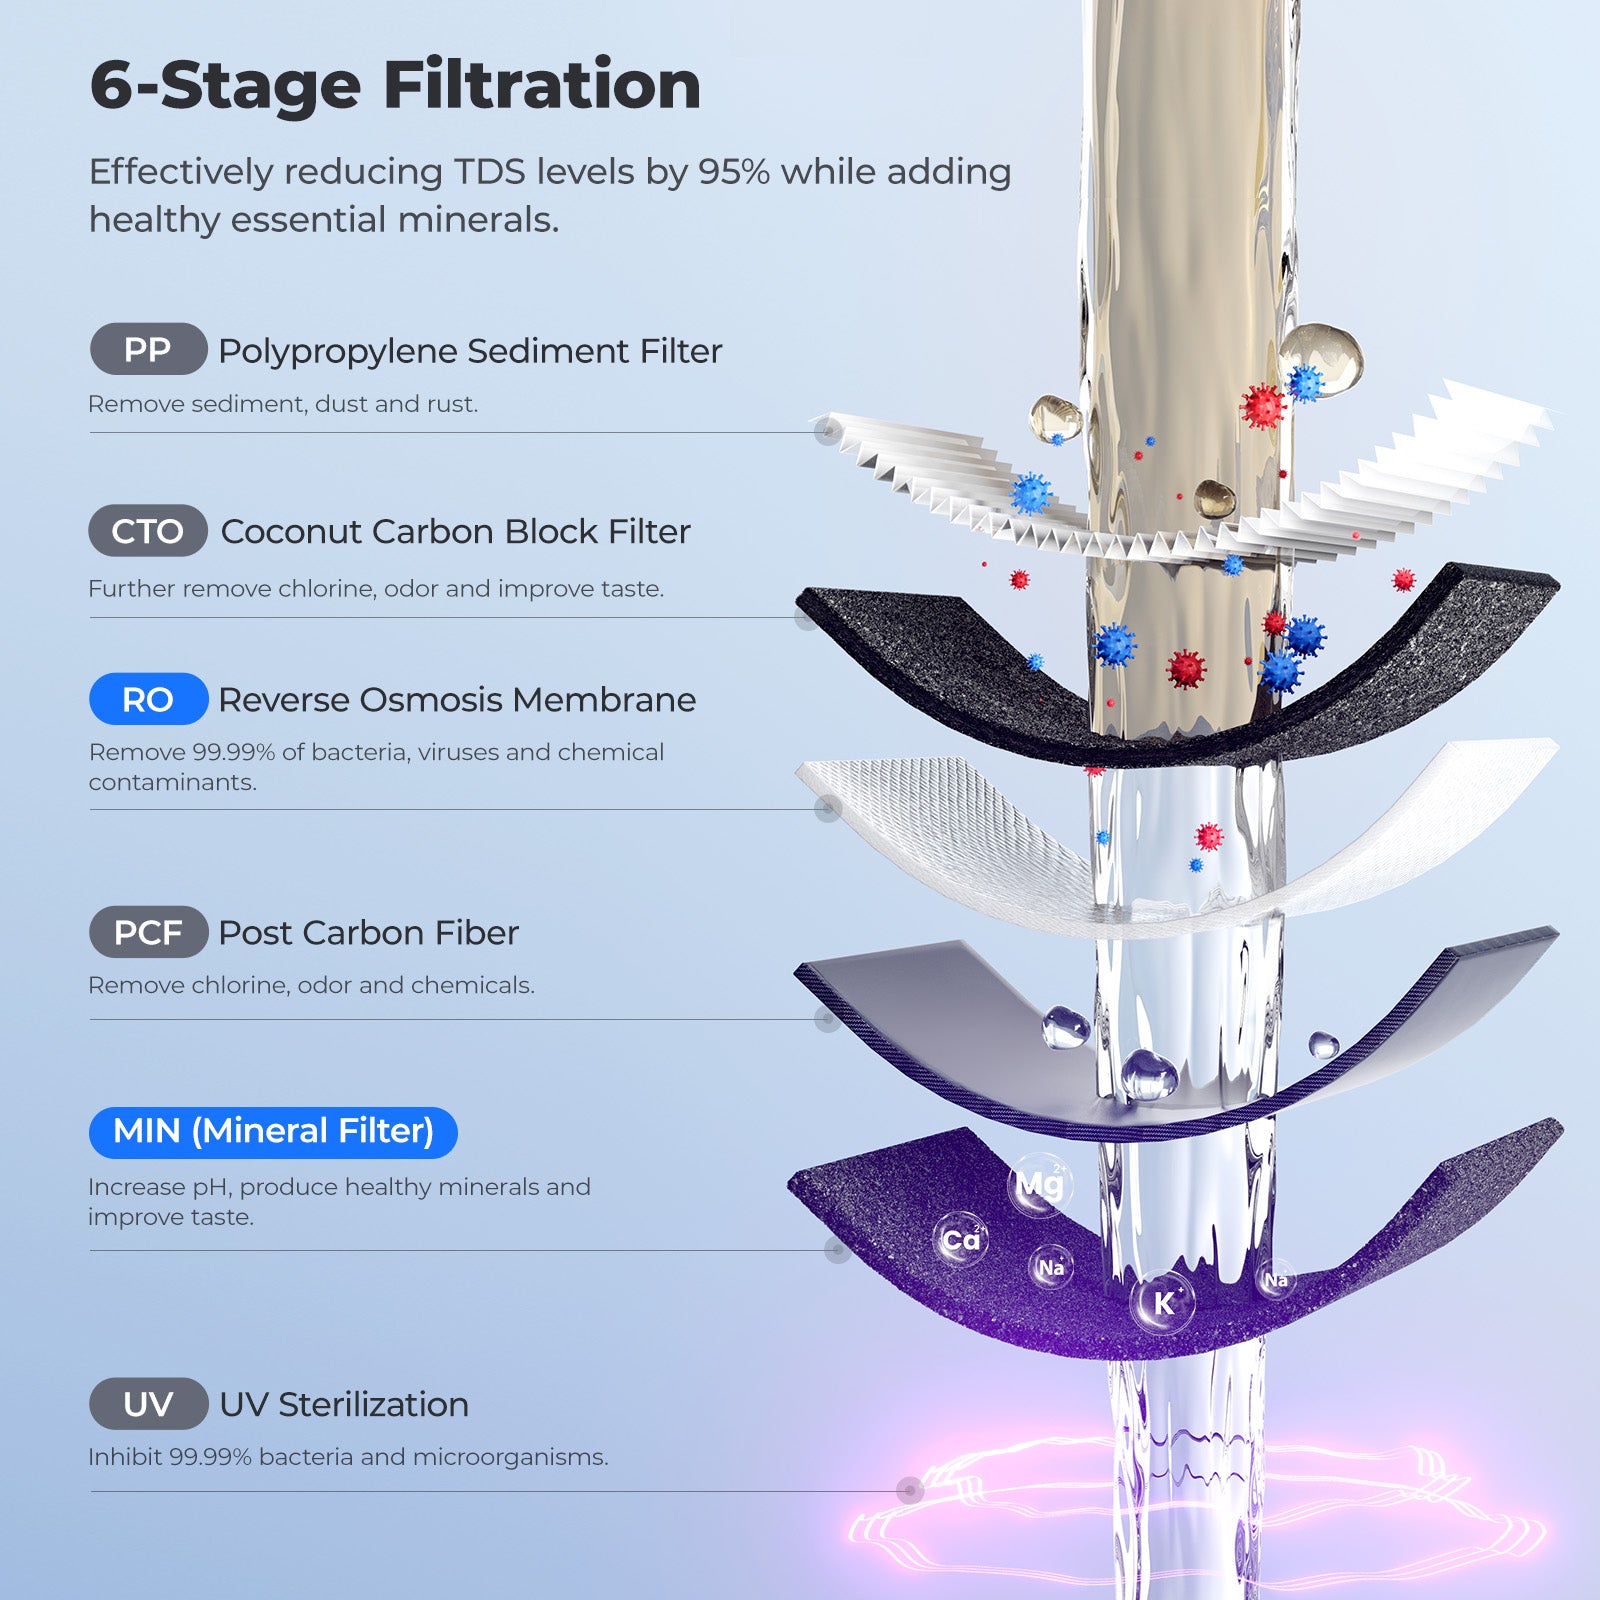
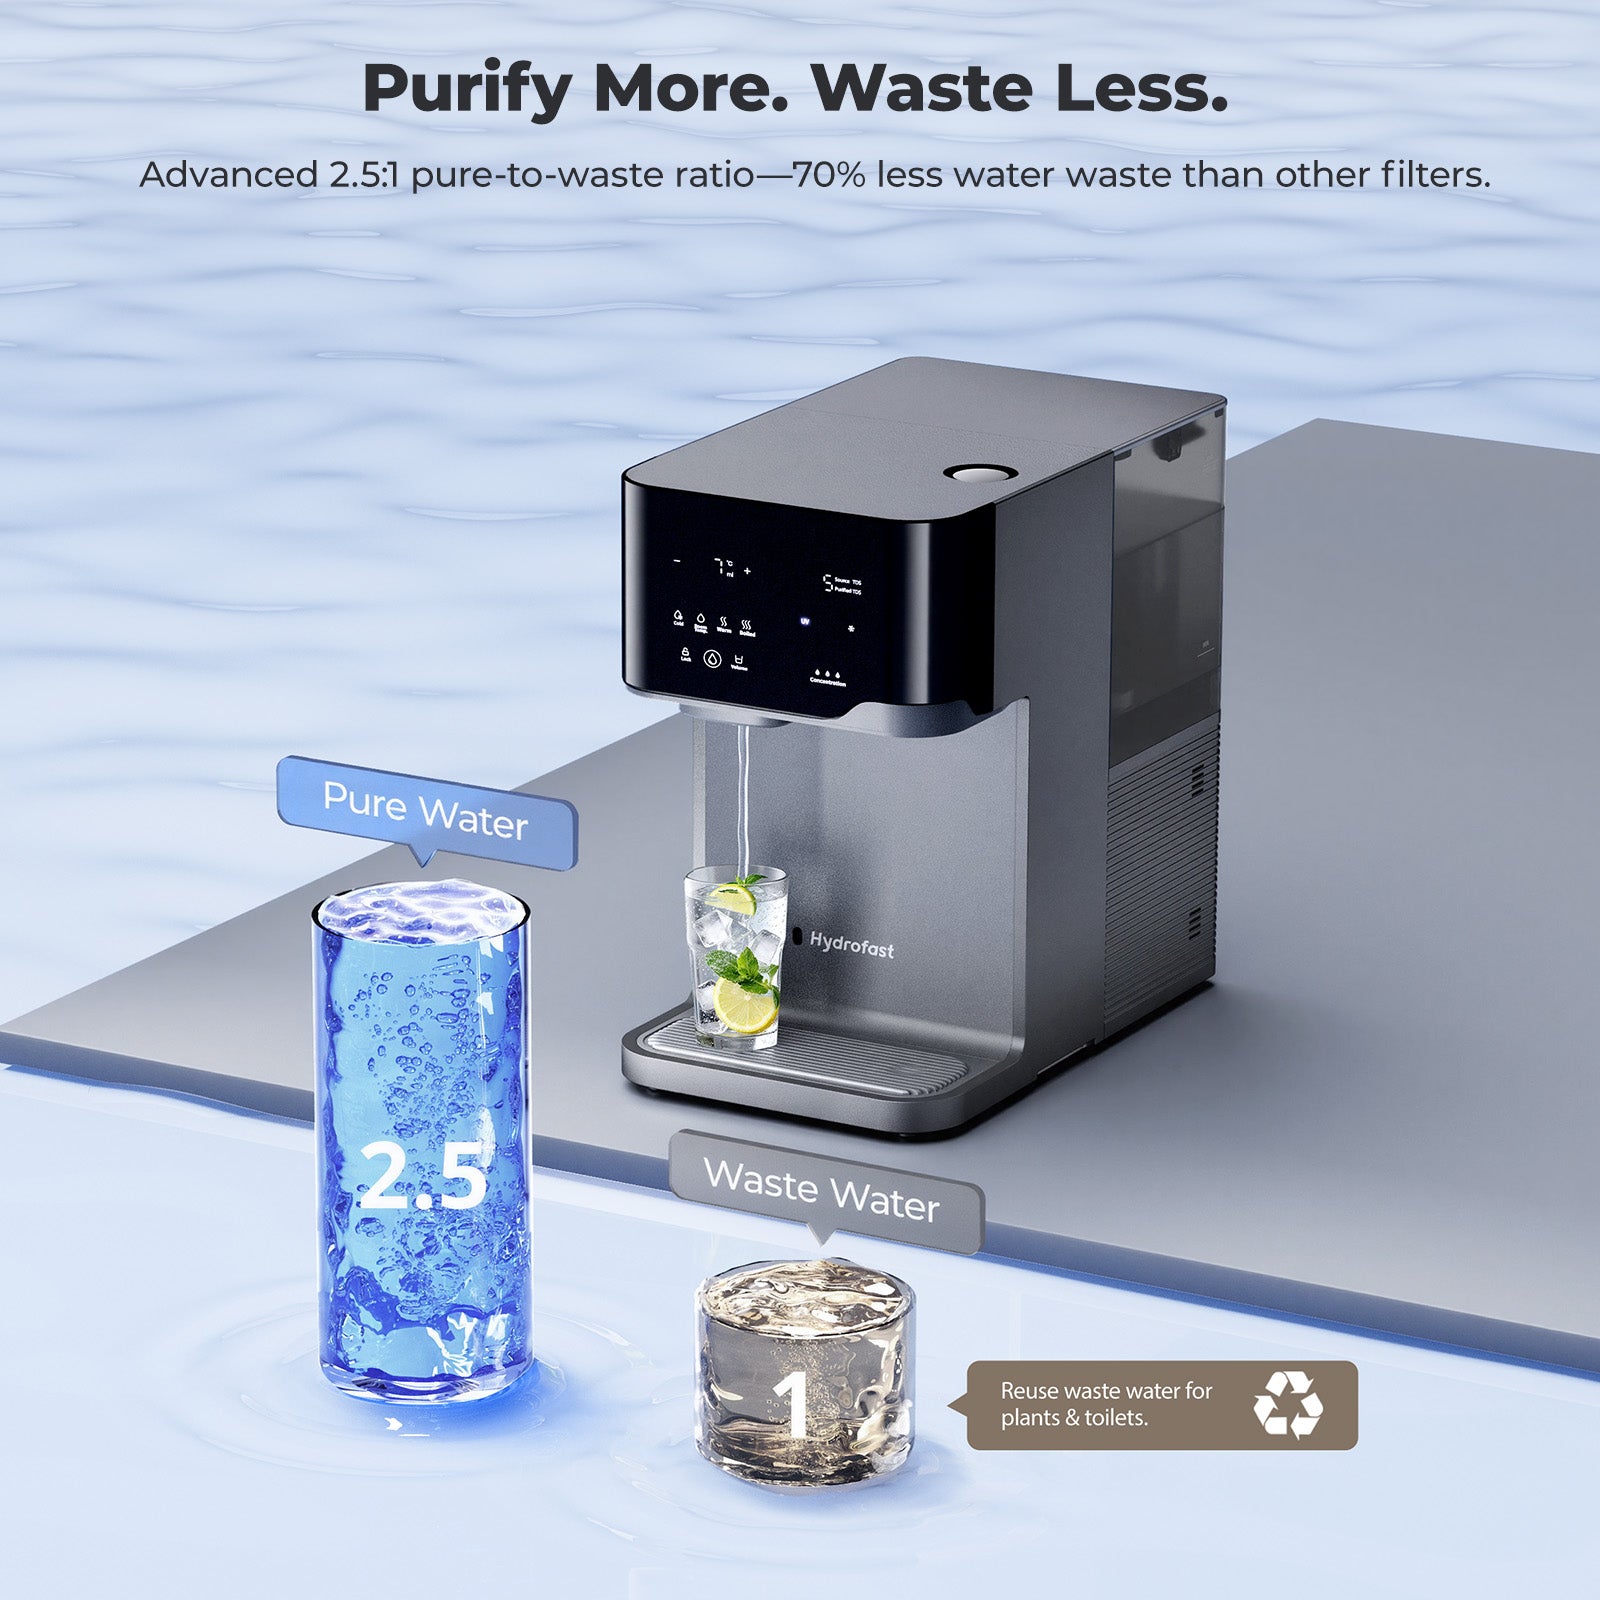
Antes de falarmos sobre a instalação, vamos perceber o que torna este equipamento tão potente. O C300 não é apenas um filtro; é um sofisticado sistema de osmose inversa para uso doméstico. Utiliza um processo de filtragem em múltiplas fases, incluindo camadas de PP, CTO, RO e PCF, para garantir a remoção de contaminantes nocivos, ao mesmo tempo que oferece diferentes temperaturas e níveis de carbonatação da água.
Especificações principais:
- Modelo do produto: C300
- Potência nominal: 1900-2200W
- Tipo de filtração: PP+CTO+RO+PCF
- Taxa de produção de água: 0,26L/min
- Dimensões: 450 x 270 x 445 mm
2. Segurança em primeiro lugar: precauções essenciais
Antes mesmo de ligar o aparelho à tomada, é fundamental compreender os protocolos de segurança para evitar danos no equipamento ou ferimentos.
- Segurança na colocação: Nunca coloque o C300 num piso inclinado ou numa bancada. Deve estar numa superfície plana e estável.
- Segurança elétrica: Não toque na tomada com as mãos molhadas. Certifique-se de que não partilha a mesma tomada com vários outros aparelhos elétricos de alta potência, uma vez que o C300 pode consumir até 2200 W.
- Fatores ambientais: Mantenha a unidade afastada de equipamentos de aquecimento e não a exponha a substâncias inflamáveis ou fortemente magnéticas.
- Restrições de utilização: Este produto destina-se apenas a uso no interior. Não permita que as crianças operem o aparelho sozinhas.
- Qualidade da água: O sistema foi concebido para utilização com água da torneira da rede pública. A utilização de outras fontes de água pode afetar a vida útil ou o desempenho do filtro.
3.º Desembalar e o que vem dentro da caixa
Quando abrir pela primeira vez o seu Hidrofast C300 Na hora de embalar, certifique-se de que tem todos os componentes necessários.
Lista de embalagem:
- Unidade principal: O coração do sistema.
- Cartucho de filtro: Normalmente pré-instalado (filtro composto de carvão ativado de fibra de carbono e polipropileno integrado para osmose inversa).
- Garrafa PET: Para as suas necessidades de água com gás.
- Tabuleiro de recolha de água: Removível para facilitar a limpeza.
- Capa protetora contra o pó: Para manter o aparelho limpo quando não está a ser utilizado.
- Manual do utilizador: Este guia serve como complemento a esse documento.
4. Instalação e ativação passo a passo
O processo de ativação é crucial porque elimina os resíduos de fabrico e prepara o filtro para utilização.
Etapa 1: Instalação e acomodação
- Retire cuidadosamente a máquina e todos os acessórios da caixa e coloque-os na bancada escolhida.
- Dica profissional: Abra a tampa do depósito de água bruta e deixe a máquina repousar durante alguns instantes. 12 a 24 horas antes do primeiro uso. Isto permite que quaisquer componentes se acomodem após o transporte.
- Certifique-se de que existe pelo menos um 10 cm de espaço entre a parte traseira/laterais da máquina e a parede para permitir uma ventilação adequada.
- Insira o tabuleiro de recolha de água no recesso na base da máquina.
Passo 2: Preparação do tanque de água bruta
- Abra a tampa superior e puxe a pega para remover o depósito de água bruta.
- Passo crucial: Encontrará pacotes de carvão ativado dentro do reservatório de água.Elimine-os antes de usar..
- Enxague bem o depósito com água limpa.
- Encha o depósito com água fresca da torneira. Certifique-se de que o nível da água está acima do nível máximo permitido. MIN linha, mas abaixo da MÁXIMO marca.
- Deslize o depósito de volta para dentro da máquina e feche a tampa.
Passo 3: Ligando
- Ligue a ficha de alimentação a uma tomada com ligação à terra.
- A máquina liga automaticamente o ecrã quando uma chávena é colocada perto do sensor infravermelho, ou pode tocar na interface para a acender.
Passo 4: Enxaguamento inicial (preparação do filtro)
Não se devem beber os primeiros lotes de água produzidos por um filtro novo.
- Ao encher o depósito pela primeira vez e ligar a máquina, esta irá realizar uma limpeza automática. Ciclo de autolimpeza de 40 segundos.
- Em seguida, deve entrar manualmente no modo de limpeza. Prepare um 2,5L recipiente resistente ao calor e coloque-o sob a saída de água.
- Pressione e mantenha pressionado o botão de dispensa de água para 8 segundos Para iniciar o modo de limpeza.
- A máquina irá dispensar água à temperatura ambiente, morna e quente em sequência, ao longo de aproximadamente 5 minutos.
Cuidado: Não toque na água durante este processo para evitar queimaduras.
Repita este processo 3 vezes.Após cada ciclo, rejeite a água purificada, esvazie o reservatório de água bruta e volte a enchê-lo com água fresca.
5. Instalação do cilindro de gás CO2 para água com gás
Uma das características mais marcantes da C300 é a capacidade de produzir água com gás. Para tal, é necessário um cilindro de gás CO2 (geralmente vendido em separado ou em conjunto com outros equipamentos).
- Abra a tampa lateral: Para aceder ao compartimento do cilindro de gás, retire a tampa lateral da máquina.
- Remova as tampas de proteção: Se for a primeira vez que utiliza o produto, rode a tampa de proteção no sentido dos ponteiros do relógio para a remover.
- Insira o cilindro: Incline a parte inferior do cilindro de gás e pressione-o firmemente na ranhura designada. Certifique-se de que está bem encaixado.
Nota de segurança: Mantenha a válvula do cilindro de gás na posição vertical e afastada de fontes de calor ou da luz solar direta. Nunca coloque o cilindro a temperaturas superiores a 40°C ou dentro do frigorífico.
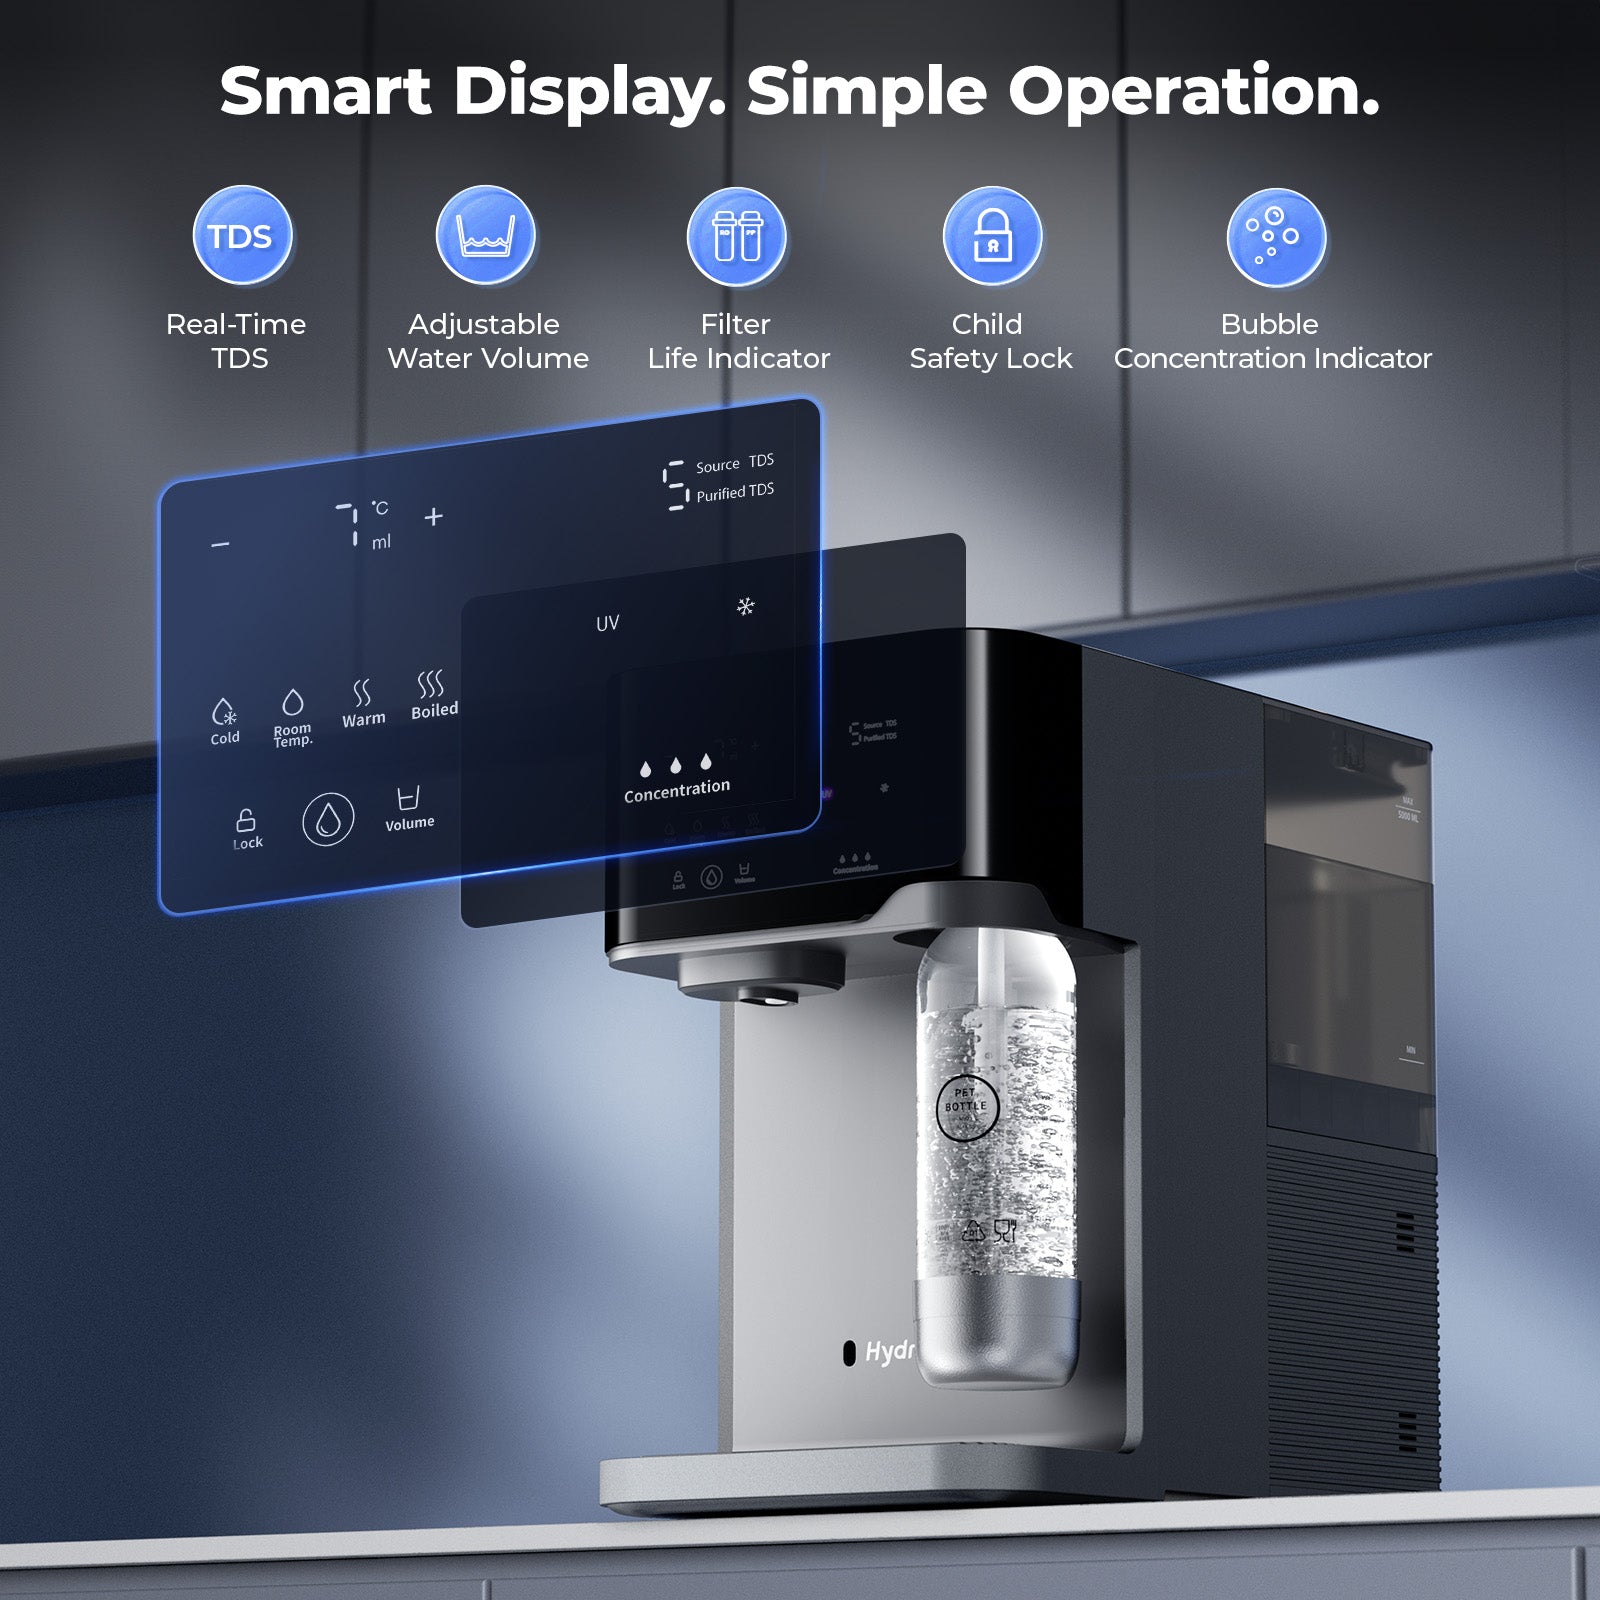
6. Como utilizar a interface
O C300 possui uma interface táctil intuitiva que permite um controlo preciso.
- Desbloqueando: Para temperaturas acima dos 45°C, deve primeiro pressionar o Bloquear botão.
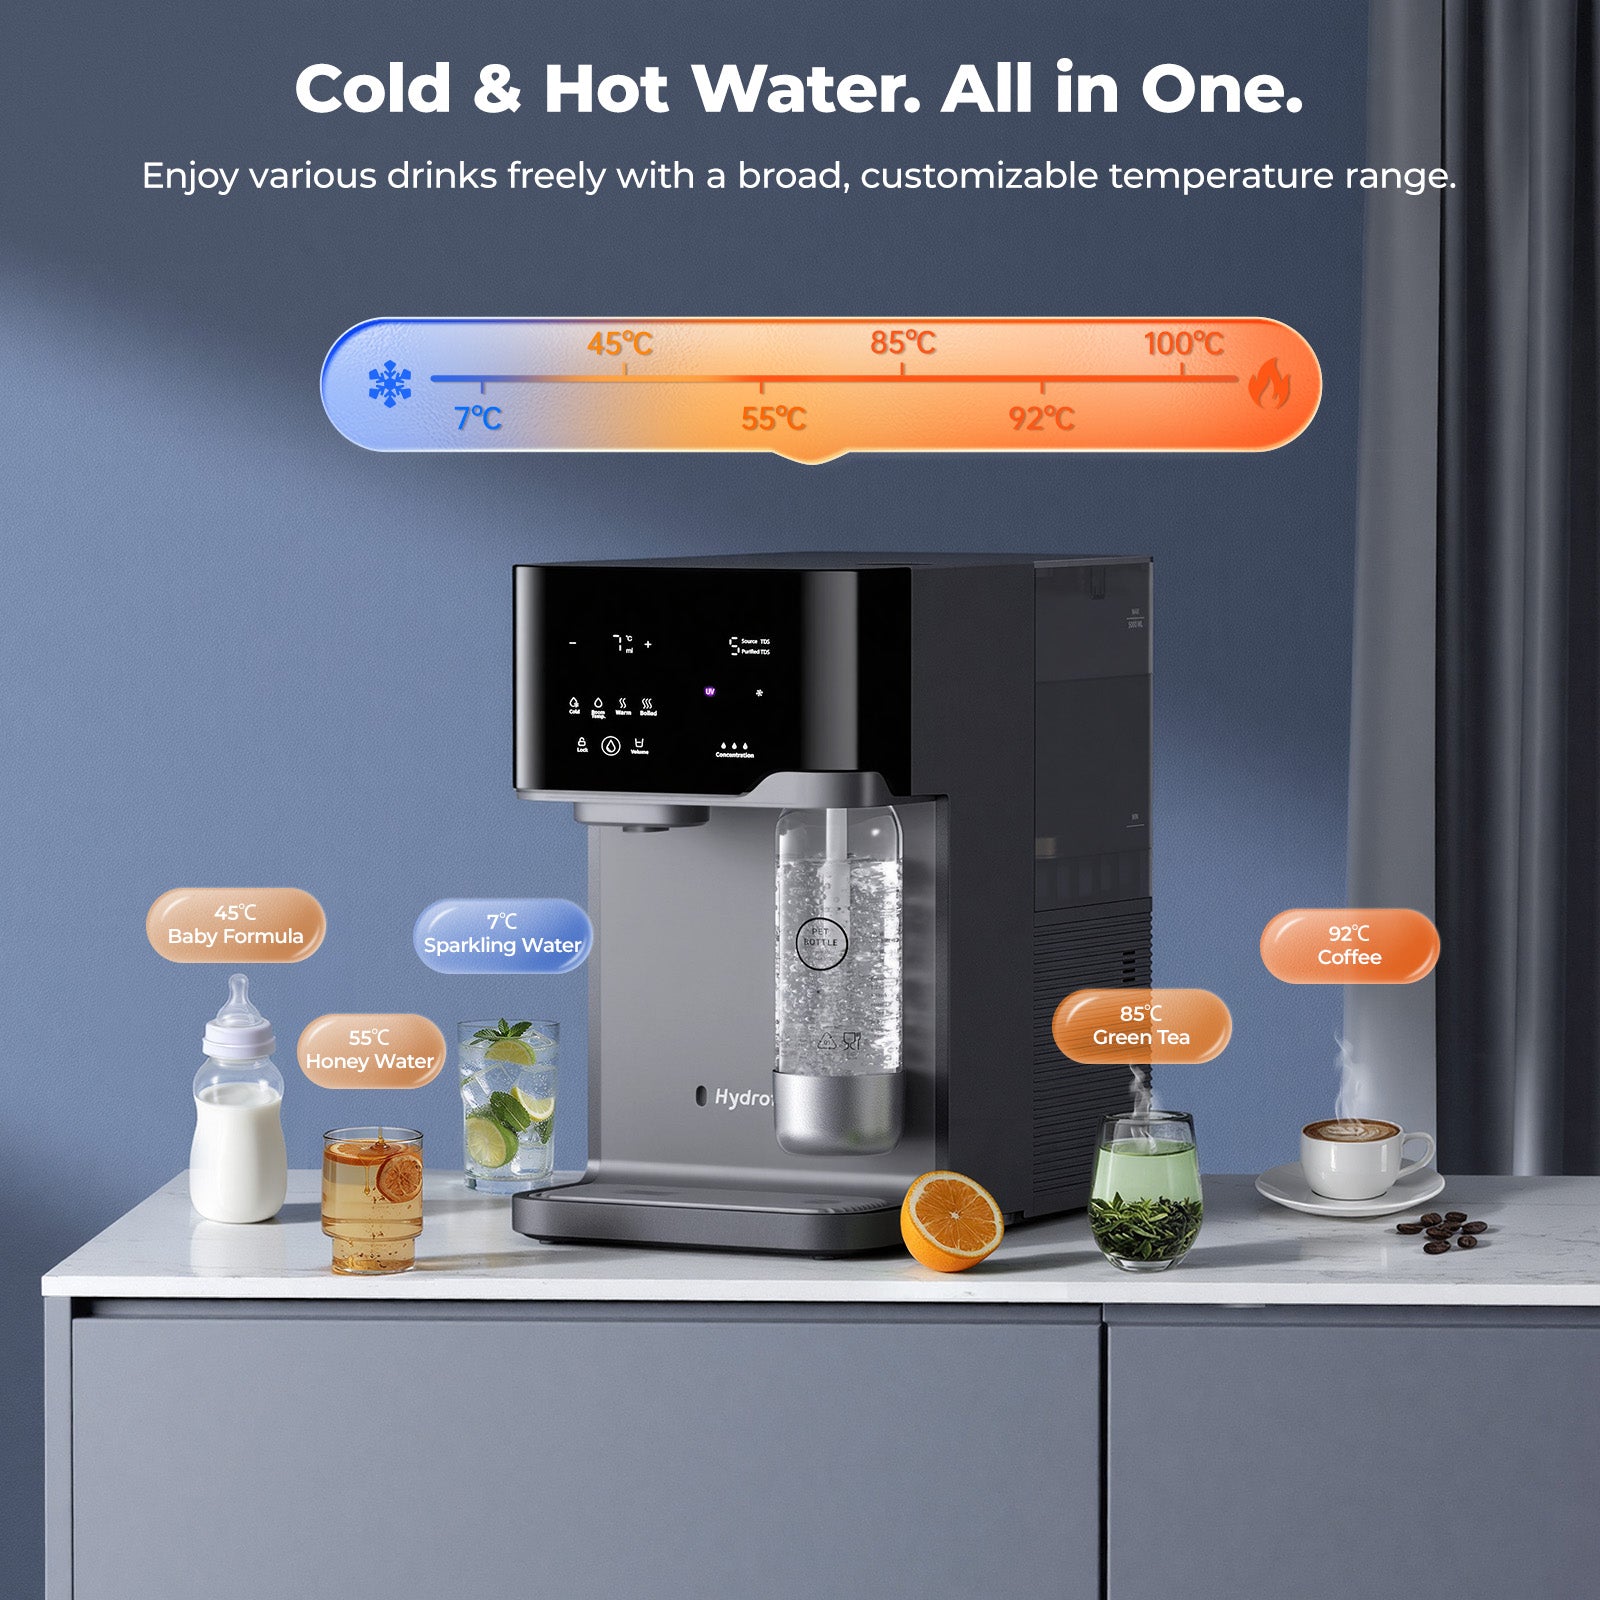
- Seleção da temperatura: Toque nos ícones de Temperatura Ambiente, Quente (45°C-65°C) ou Fervido (85°C-100°C). Pode usar o +/- Botões para ajustar a temperatura em incrementos de 1°C.
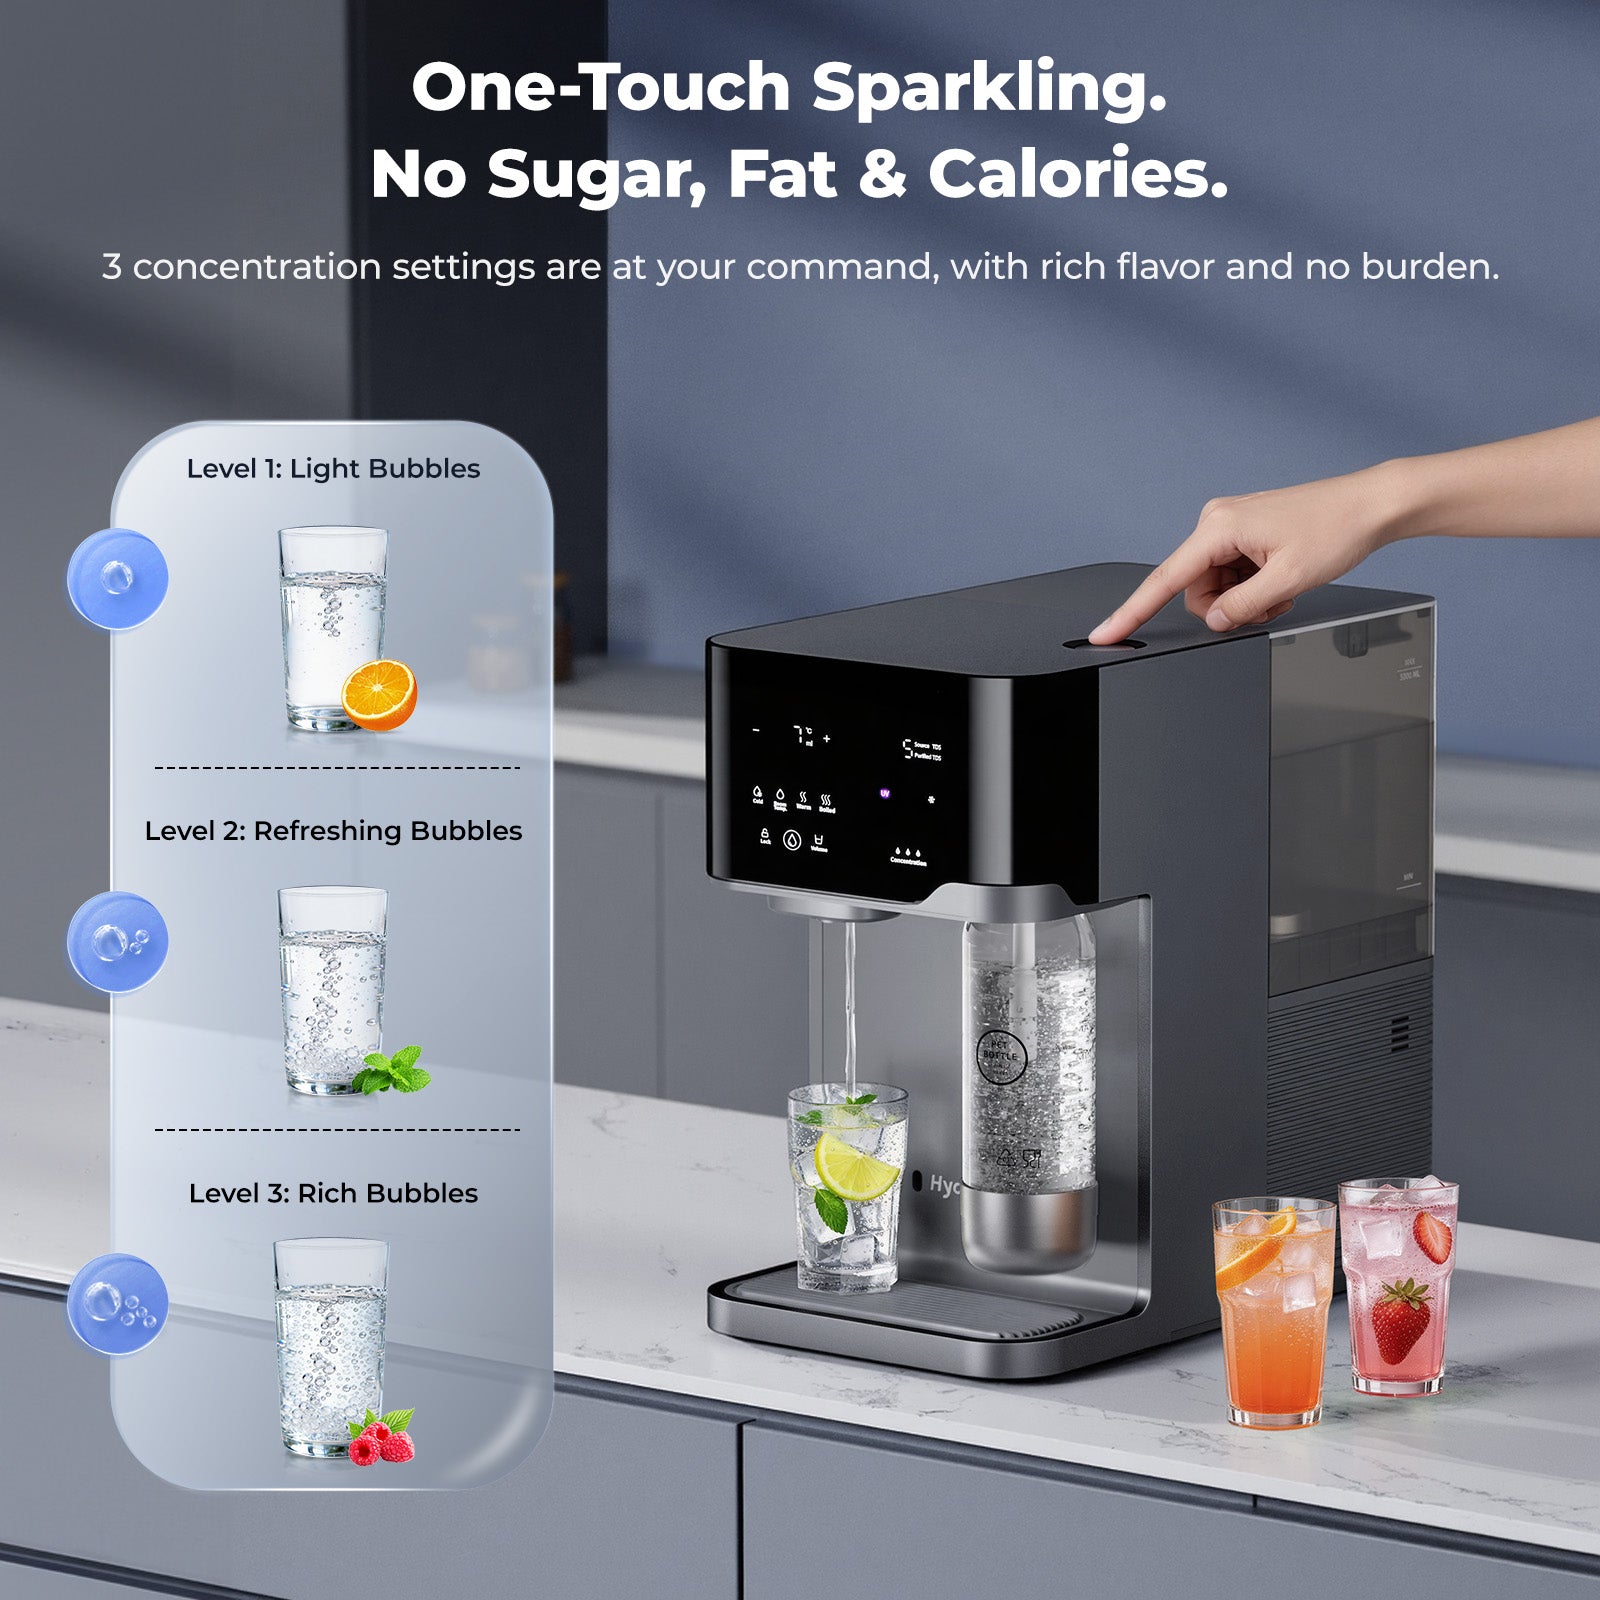
- Seleção do volume: Toque no Volume Botão para alternar entre 150ml, 250ml, 400ml e 500ml. Também pode usar +/- Para personalizar o volume entre 100ml e 999ml.
- Função de arrefecimento: Esta função vem normalmente desativada por defeito em máquinas novas. Para a ativar, pressione e mantenha pressionados os dois botões. Frio e Temperatura ambiente Os ícones permanecem visíveis durante 3 segundos. Um sinal sonoro emitirá três sinais sonoros para confirmar.
7. Limpeza e Manutenção de Rotina
- Para garantir a melhor qualidade da água e a longevidade do seu equipamento, é necessária uma manutenção regular.
Manutenção de tanques
- A água parada pode causar odores e proliferação de bactérias.
- Depósito de água bruta: Limpe este tanque semanalmente utilizando um produto de limpeza próprio para o contacto com alimentos e um pano macio.
- Reservatório de água purificada: Se a máquina estiver inativa durante mais de 24 horas, o indicador "Água Pura Armazenada durante mais de 24 Horas" poderá acender. Nesse caso, esvazie o reservatório e produza água fresca.
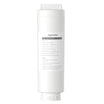
Substituição do filtro
- O C300 utiliza o Filtro composto multifuncional HF04.
- Ciclo de substituição: Geralmente todos os 6 a 12 meses, dependendo da qualidade da água local e do volume de consumo.
- Quando substituir: Uma luz vermelha permanecerá acesa na interface de operação quando o filtro estiver saturado.
- Como substituir:
- Desligue o cabo de alimentação.
- Abra a tampa do filtro e levante a pega.
- Desaperte o cartucho antigo rodando-o no sentido contrário ao dos ponteiros do relógio e puxe-o para fora.
- Insira o novo cartucho e aperte-o no sentido dos ponteiros do relógio.
- Ligue novamente a máquina e pressione e mantenha pressionado o indicador do filtro durante 3 segundos para repor o temporizador de vida útil.
Crucial: Repita o procedimento de "Enxaguamento Inicial" (Passo 4 da instalação) três vezes para o novo filtro.
8. Solução de problemas comuns
Até as melhores máquinas podem apresentar problemas. Eis alguns cenários comuns:
- Ruídos elevados: Geralmente, trata-se da bomba auxiliar. Os sistemas de osmose inversa necessitam de uma bomba para forçar a água através dos minúsculos poros da membrana. Este ruído ocorre apenas durante a produção de água e é normal.
- A descarga não inicia: Se premir o botão de dispensa durante 8 segundos e nada acontecer, verifique se o Fecho de segurança para crianças está ligado (se estiver configurado para quente/morno) ou se o nível de água no depósito estiver demasiado baixo.
- Vapor durante a ebulição: Ao ajustar o ponto de ebulição (que por defeito é de 100 °C), pode ser expelido algum vapor de água. Mantenha-se a uma distância segura.
- A água não está suficientemente fria: Certifique-se de que a função de arrefecimento está ativada (consulte a secção 6). Se tiver dispensado uma grande quantidade de água com gelo, a barra de progresso poderá apresentar animação enquanto a água fresca estiver a ser arrefecida.
9. Conclusão: Desfrute da sua água pura
Instalando o Filtro de água de bancada Hydrofast C300 Pode parecer intimidante devido à necessidade inicial de enxaguar, mas estes passos são essenciais para garantir que cada copo de água que bebe é o mais puro possível. Seguindo este guia, terá criado um sistema que proporciona não só hidratação, mas também uma experiência personalizada para cada membro da sua família — seja para uma chávena de chá fumegante, um copo de água gelada ou uma bebida refrescante com gás.
Guarde este manual e guia para futuras trocas de filtros e desfrute da tranquilidade que a tecnologia avançada de osmose inversa da Hydrofast proporciona.
Pronto para começar? Encha o reservatório, inicie o ciclo de enxaguamento e dê as boas-vindas à C300 em sua casa!


Deixe um comentário
Todos os comentários são moderados antes de serem publicados.
Este site está protegido pela Política de privacidade da hCaptcha e da hCaptcha e aplicam-se os Termos de serviço das mesmas.